Facebook Marketing for Beginners: 13 Best Practices for Businesses
Are you looking to set up a Facebook page for your business? Whether you’re brand new to the platform or have only used it with a personal profile, the process sure can be confusing.
With years spent managing Facebook pages, I have learned a ton of tips and hacks for properly setting up your business page. Even if you’ve had your page running for a while, I bet there are still some features you didn’t even know about!
Today, I want to share with you some of the best practices for setting up your business page and rundown of some of features businesses can use on the platform. Let’s get started!
Facebook Page Set-Up Best Practices
Create Your Business Page
Creating your business page is super simple. Follow these steps:
Sign in to your personal Facebook account.
From your main page, click the plus sign in the top right corner.
Click, Page.
Facebook will then lead you step-by-step on how to create your business page.
Follow the advice in this guide for best practices while setting up your Facebook business page.
Facebook Profile Picture
Choosing the right profile photo is very important because it will appear on every post, ad, and comment you make as a page. For businesses, I suggest using your logo as your profile photo as it will make your business easily identifiable.
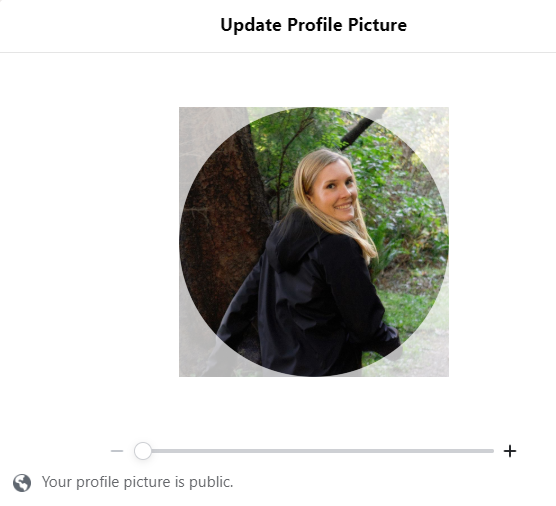
You will want to upload your logo in a square format (180 x 180 pixels). However, Facebook will display it as a circle on your page and on the feed (approximately 160 x 160 pixels). Ensure there is adequate white space around your logo to ensure it doesn’t get cut off when presented as a circle. If you need to edit your logo to meet these dimensions, I suggest using Canva.
If you are a personal brand such as an author, speaker, or freelancer (like me!), you will want to use a photo of yourself as your profile photo. Since you are synonymous with the brand, people want to easily identify your business as you the person.
My profile picture square upload vs circular display.
Facebook Cover Photo
Anyone who visits your profile will be met with your cover photo. I like to use bright coloured photos that showcase either the physical location of the business or the team members who work there.
I also like to include any important info in the design. This can be an important update, a phone number, location, or general services. What you post depends on how often you will be changing your cover photo. If you want to post and leave it for awhile, make it as general as possible.
Keep in mind, it will display differently when on mobile vs on desktop. On desktop, the dimension are 828 X 315 pixels. For mobile, it is 560 X 315 pixels. Any text or important info should fit inside the mobile safe zone.
You also have the option of posting a video! This is great if you already have a video on hand that showcases your video. Remember, there will be no audio.
My cover photo on desktop.
The same cover photo on mobile.
Facebook Page About Section
When creating your page, it will prompt you to fill out the about section. My advice is to fill out as many sections as possible. The more information your potential customers can find on their own, the better. Important details will show on the sidebar of your main page. All about details can be found in the about tab on your Facebook page.
You will want to ensure this information stays updated. For example, if you change your business hours, update the page immediately. Any important updates to your about section will automatically post to your feed and inform your followers or page visitors of the change.
Facebook Page Username
The username is the @ found directly under your profile picture. The username helps your page to be discoverable and it will actually update your URL, making it easier to share your Facebook page.
When selecting a username, I recommend creating a simple username. Try to use your business name as your username. If taken, consider adding a location to your profile. For example, I use @HollyHeuverSocial as my username. In the event that it was taken, I would make it @HollyHeuverSocialVancouver.
If you try to make a username and it says you are ineligible, there could be a few reasons why you are seeing this message.
You don’t have proper page access. You must be an admin on the page.
Your page doesn’t have enough likes. You need at least 25 likes on your Facebook page.
The username is not available.
The username is too long or too short.
The username contains unsupported characters. It can only contain alphanumeric characters.
This business’ username is @cottonuityvintage
Facebook Page Button
At the top of your page, there is a button that you can customize with your own call-to-action. With a prime location at the top of your page, it is an easy way for people visiting your page to take quick action.
There are a few options you can use for your button including contact options, booking options, gift card, learn more, use app, play game, etc. Decide which one is best for your business and then customize it.
As an easy way to get people to click, you don’t want to leave your button blank.
Cottonuity uses a Shop Now button to direct people to shop on their website.
Automatic Inbox Responses
Unless you’re tied to your Facebook page, you won’t always be readily available to answer direct inbox inquiries to your business page. On your main page, Facebook actually posts your average response time and rate. It is important to keep this high so people know they can trust Facebook as a means of contacting your business.
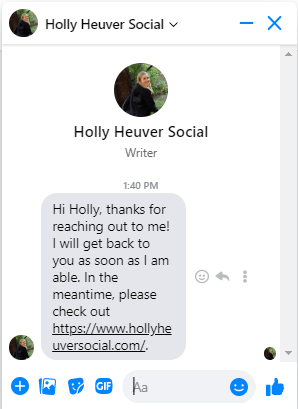
To set up an automatic response, go to your inbox and select Automated Responses. Here you can customize your automatic message, the timing, and even personalize it with the recipient’s name.
You can even go as far as set up frequently asked questions if you receive many of the same questions. For example, I have set up an automatic response providing a menu for a restaurant client.
While Facebook replies for you, you can also reply again later when you check your Facebook page and inbox.
Facebook Admin Roles
Accessing a Facebook page must be done through a personal profile. You can find the page by visiting the section “Pages” on your Facebook timeline. Alternatively, anytime you visit the page, you will automatically be switched to interact as the business.
I highly discourage setting up a fake Facebook profile to manage the page. I see many businesses create a general account to allow multiple people to access the account. The problem with this is that Facebook likes to crack down on fake profiles by removing them. Suddenly, you find yourself without access to your Facebook page. And trust me, gaining access again is a real headache!
If you want to control which employees have access to the page, you can do so by adding someone to the page. To add someone to your Facebook business page:
Go to your business’ Facebook page.
Click settings from the left-hand side menu.
Click page roles from the left-hand side.
In assign a new role, type in the person’s personal profile name or the email associated with their account.
Change their permissions to either editor, admin, moderator, advertiser, or analyst.*
Click add. Facebook will ask you to confirm by entering your password to your personal Facebook account.
The person will receive an invite through their notification to accept their new page role.
*Different page roles have different permissions. Learn more about the different permissions here.
Pro Tip: Only admins can add other people to the page. NEVER leave a page until you are sure there is another admin who has complete access to the page.
Templates
Templates are a really underused feature for most businesses. Through templates, you can choose different tabs your business page will feature. For example, there are templates specifically for restaurants, nonprofits, venures, shopping, service-based businesses, and more.
Once you select your template, you can also customize tabs. For example, a store can actually add a shop tab or a restaurant can add a menu tab. You can also choose to hide certain tabs such as review or event pages.
To change the template of your Facebook business page, visit settings and click on templates and tabs. Browse through the different options and see if any suit your business better.
This restaurant has a specific menu tab for customers to look at.
Facebook Business Page Features
Facebook Posts
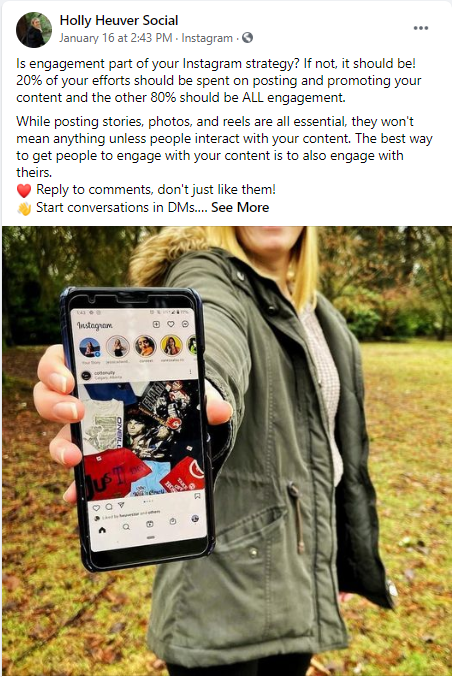
You’ve all seen them! Facebook revolves completely around posts. Every time you make a post from your business page, it will be posted on your page’s feed. Additionally, people who like or follow your page will also have your posts appear in their timeline. However, the amount of people who see your posts organically has dropped significantly in the past few years.
When making a post, you can choose to add a photo or video to your post. I recommend always adding a photo or video, otherwise your post will easily get lost if it is only text.
You can also choose to boost your post, which is essentially putting money behind your post as a Facebook ad.
Notifications and Inbox
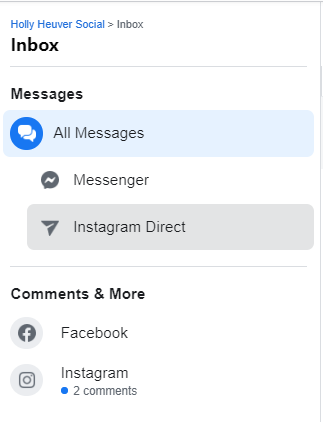
Interacting with people is something you should be doing every day on your business page. To see activity such as who has liked your posts, who has commented, new reviews, and more, check under your notifications. You can find your notifications under the left-hand side menu of your business page.
On the same menu, you can find your inbox. Here you will be able to answer direct messages people have sent your page. If your Facebook and Instagram pages are connected, you will also be able to answer direct messages from Instagram here as well.
Facebook Stories
Stories are a relatively new feature to Facebook. They are quick snapshots, updates, and content that will only be viewable for 24 hours. Stories are designed to be seen on mobile and should be always be created vertically.
So far, I haven’t seen a ton of people utilizing stories. Personally, I only use Instagram stories but I have it set up so that my posts on Instagram also appear on Facebook. This is an efficient way of sharing content to multiple platforms. You put in work in one place, but get double the exposure!
Here are some stories from businesses I see on my personal timeline.
Events
Events is a great way to get exposure for any upcoming events, online or in person, that you have coming up.
Events creates a separate page where you can list event details such as time, location, the host, price, and where to purchase tickets. People can click attending and you can also invite people to attend your event.
You can also promote your event through a post and even boost it.
Insights
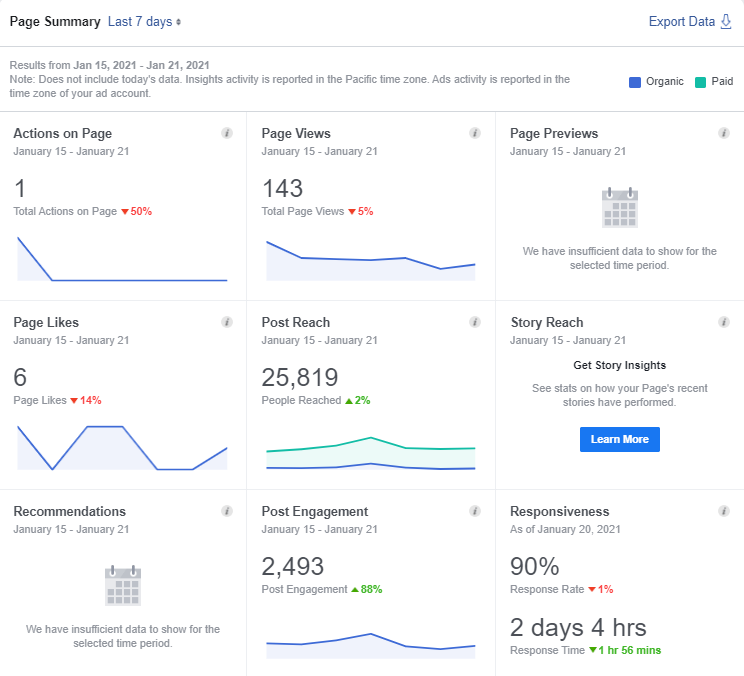
Insights are essential for all businesses who use Facebook. I won’t go into a ton of detail on insights right now as that is a whole post on its own, but I do want to tell you how to access it.
You can find insights under the left-hand side menu of your business page. Inside insights you can find information such as the demographics of your followers, the reach of your posts, info on your competitors, and so much more.
Take a look at your insights often to know what is working and what isn’t. This will help you create content that your audience really wants to see!
Facebook Live
Going live is a really fun way to interact with your Facebook page followers. All you need is a phone, a quiet room, and somewhere to prop up your phone.
Before you go live, I recommend promoting it to your followers at least 24 hours beforehand. Depending on what you’re going live for, ask them to submit questions they may have about your product, industry, service, etc. That way you will have lots of material to go over before you even get started!
Once your live video is done, it will be available on your page for those who may have missed the event.
And there you have it. That covers the basics of Facebook page’s for business. There are a ton of features on the platform for businesses to utilize in order to reach more customers and truly engage with them. If you ever need Facebook help, I’m just an email away!

